|

|
|
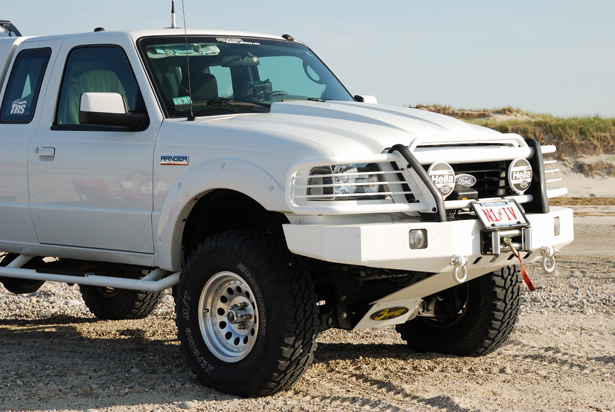
Before!
|
|
So as not to destroy
the factory hood for future use, I purchased an aftermarket
steel replacement hood from CertiFit.com, a National Auto Body
parts supplier. I then
researched and purchased a steel cowl induction scoop made for a
'93 - '97 Ranger and adapted it to the '07 hood. I
purchased it from www.truckn.com,
a supplier of suspension parts and accessories in Mesa, AZ. |
|
I traced the shape
of the scoop onto the hood and cut out a 24" square section
of the hood within the confines of the scoop template. I then
drilled, bonded and pop riveted the scoop onto the hood. After
the bonding adhesive setup, I ground the edges down to make the
transition smoother. In comes Paul Wagner, our prep and paint
guy at work - Paul has the Master's touch with plastic filler.
He recommended MarLite fiberglass reinforced filler putty due
the vibration and heat the hood will endure. He spent about a
day and a half filling and sanding until the hood looked like it
was a one piece cowl induction hood. |
|
Paul then sealed the
entire hood with an epoxy primer /sealer to get it ready for the
Dupont Imron finish coat. I took over from there and put three
medium coats of Ford factory white Imron on the entire hood. My
wife accompanied me to the shop on Sunday afternoon to move it
out of the spray booth for Monday's work schedule. Once we
arrived, she said "when are you going to put it on?" I
said "I'll need another person to help me lift off the old
one and install the new one!" She said "Can't I help
you do it?" Now I remember why I married this woman!
It took us about an hour and we jumped in and headed for the
beach... hope you enjoyed the project! Pictures below... |
|
|
|
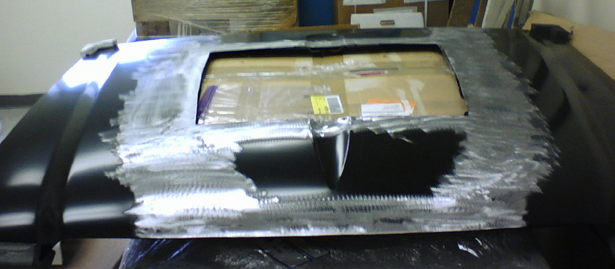
I cut the hole approximately 24" X
24"...
should yield plenty of air.
|
|
|
|
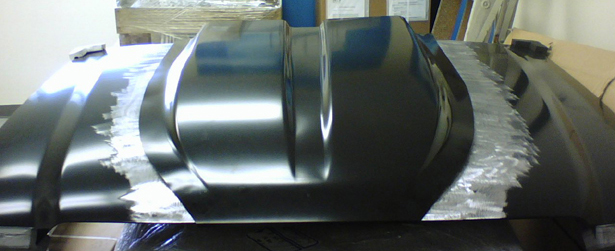
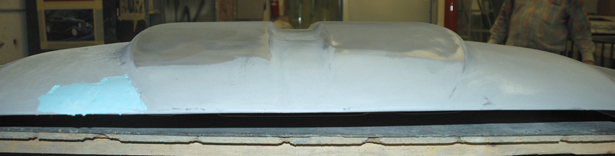
It has a double hump
look due to the center groove!
|
|

|
|
The '93 - '97 scoop
had a slightly different contour... we fixed that! |
|
|
|
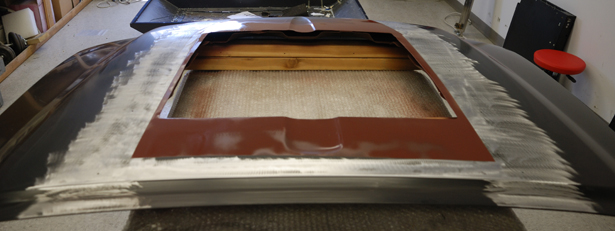
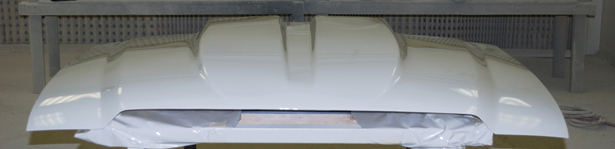
Primed around hole...
can't get to that later!
|
|

|
|
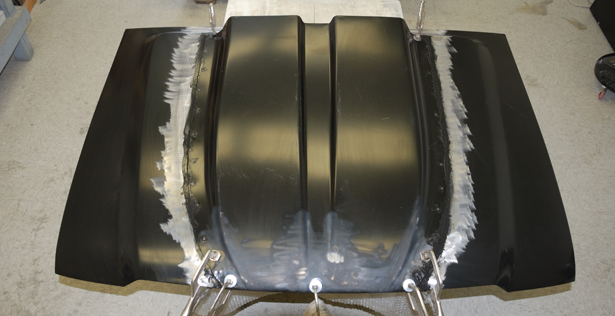
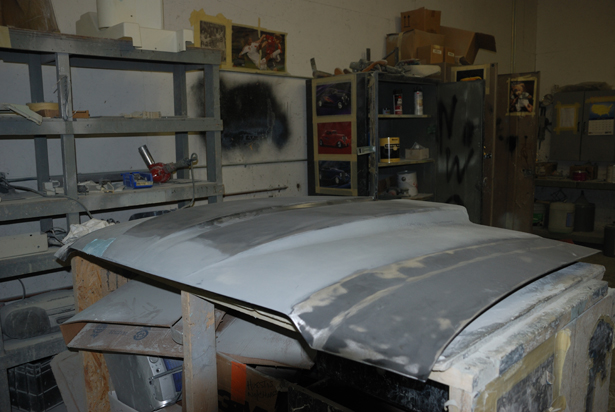
Scoop rear baffle
bonded into place and ready for trimming and fitting.
|
|

|
|
I used 3M "8115 Panel Bonding
Adhesive" and pop-rivets!
|
|
|
|
Bonded... when dry, sand, mud, prime and
paint...
|
|
|
|
Bonded, riveted and drying...
|
|
|
|
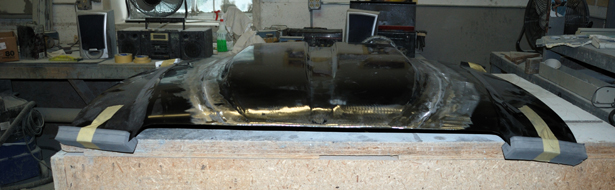
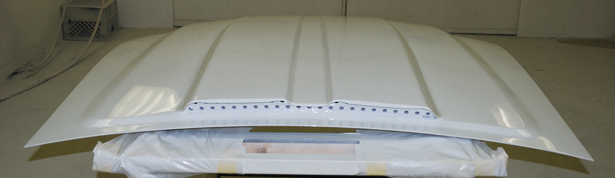
Edges & rivets
smoothed and ground down... ready for mud!
|
|
|
|
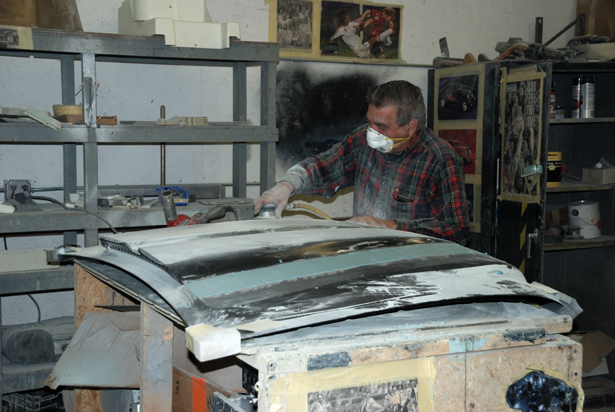
Paul Wagner, our prep guy at
work, sanding the first coat of MarLite reinforced filler...
|
|
the filler has fine
fiberglass strands in it to make it withstand the hood's
vibrations.
|
|
|
|
First coat done and
scored for second coat...
|
|
|
|
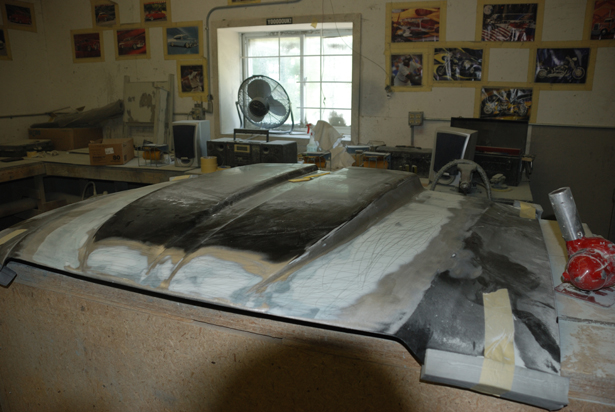
Second coat sanded and
spot work added...
|
|

|
|
Seams came out very
nice...
|
|
|
|
...a little more
sanding and prep... |
|
 |
|
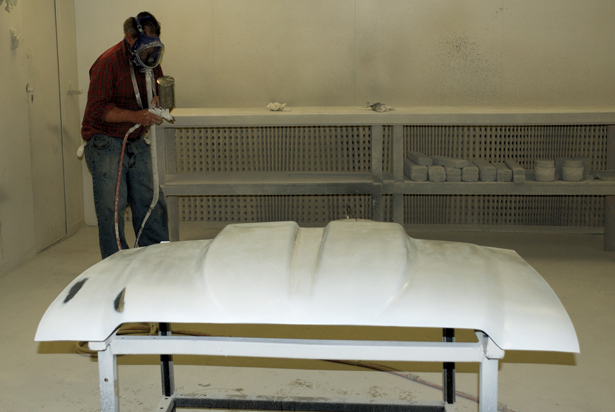
Paul getting ready for
the final coat of primer/sealer. |
|
 |
|
Looks much better
white, even if it is primer! |
|
 |
|
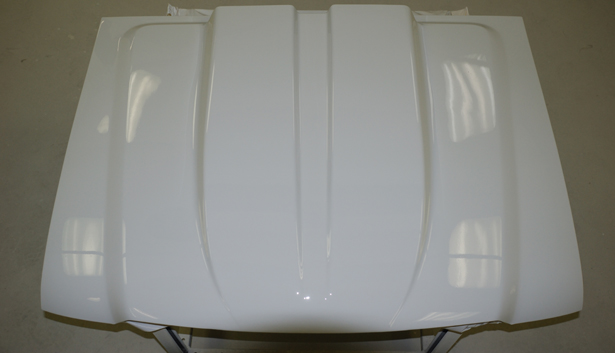
Fresh coat of Dupont
Imron polyurethane enamel... |
|
 |
|
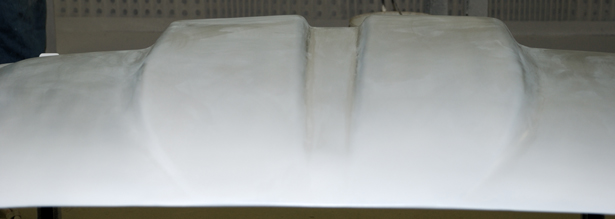
Scoop has a built in
baffle for leaves, varmints, etc. |
|
 |
|
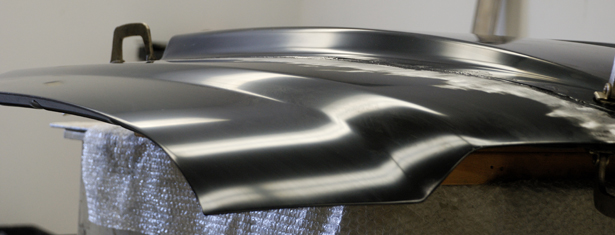
The scoop offers a conservative
2.5" rise... |
|
 |
|
Looks almost factory,
thanks to Paul Wagner's bodywork skills... |
|
|
|
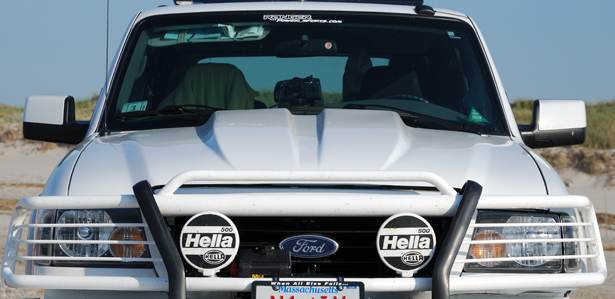
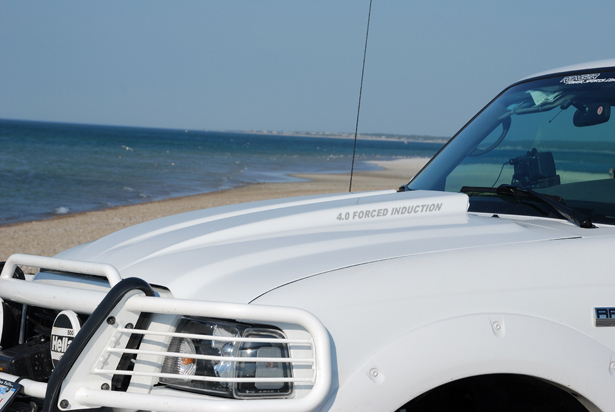
After! |
|
|
|
A little vinyl
lettering from "Signs by Tommorrow" in Norton, MA! |
|
|
|
It gives the truck a
little bit more aggressive look!
|
|